Armstrong lamps are known for their wide range of applications, ease of installation and luminous flux (brightness) parameters. LEDs have moved the market leader – fluorescent lamps, and continue to strengthen their positions. Thanks to the development of technology, the installation of such lighting fixtures will not be a problem, and the design features will allow you to carry out repairs yourself.
- Device LED lamp Armstrong
- Circuit diagram
- Preparing to repair LED fixtures
- Do-it-yourself Armstrong lamp repair
- Fault definition
- Step-by-step actions if the Armstrong lamp does not work
- How to change the lamp in the lamp Armstrong?
- Repair of the power supply, and what breaks in it more often
- Armstrong fluorescent lamp conversion to LED
- Electrical Safety
- Feedback on the repair of LED lamps
Device LED lamp Armstrong
Ceiling LED lamp Armstrong has dimensions of 600×600 mm. The lamps are built into suspended ceiling profiles of the appropriate type. Design and appearance may vary, but this does not affect the principle of operation.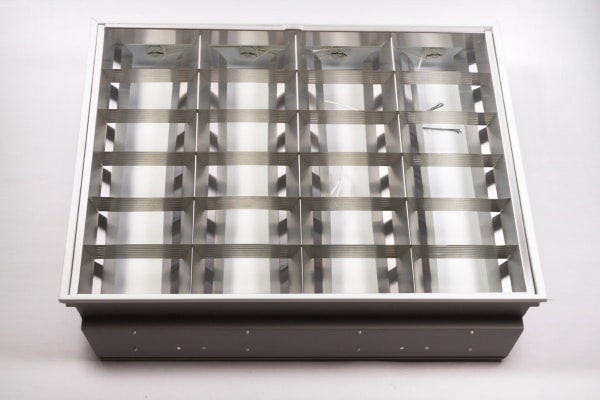
The basic structure is as follows:
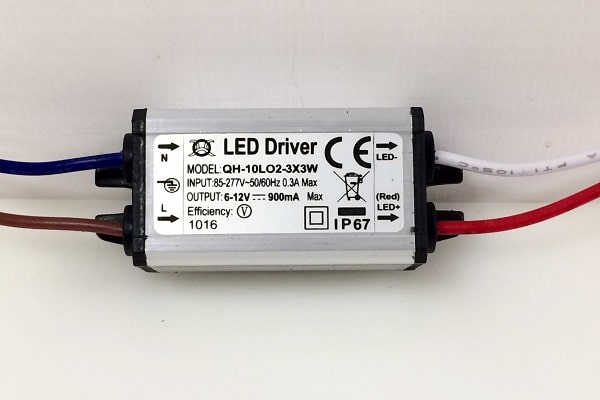
- Power supply 12 V (or driver).
- The metal case of the lighting device (radiator of the LED strip).
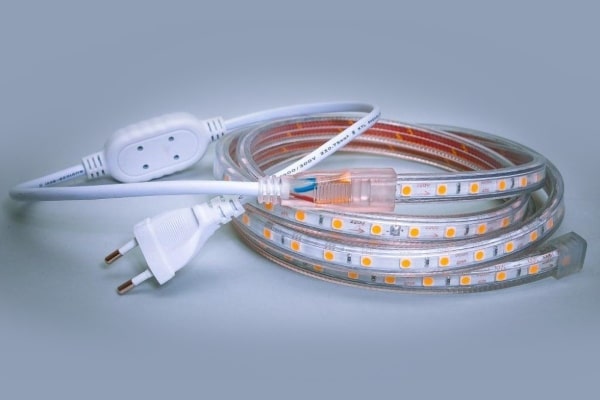
- LED strip (there are various types of mounting LEDs).
- Screen protecting the lamp (diffuser).
An example of the device device, see the photo: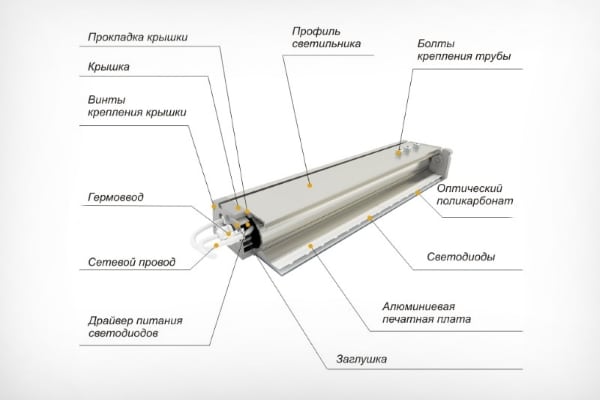
Diffusers in Armstrong LED luminaires are available in both opaque and prismatic versions. The luminous flux passing through them is 3200 lm in the first version and 3600 lm in the second. The power consumption indicator is unchanged – 32 watts.
An Armstrong 4×18 lamp powered by four 18-watt fluorescent lamps consumes 2.5 times more energy than its LED counterpart. The weight of the product can vary from 1 kg to 4 kg. Light is emitted at an angle of 120 degrees. The service life is 50,000 hours, which is several times longer than that of the 4 × 18 counterpart.
Circuit diagram
Each manufacturer of Armstrong light bulbs has an individual power supply circuit, it is almost impossible to find a typical example for your device, they are very different. But you can use the following scheme as an example: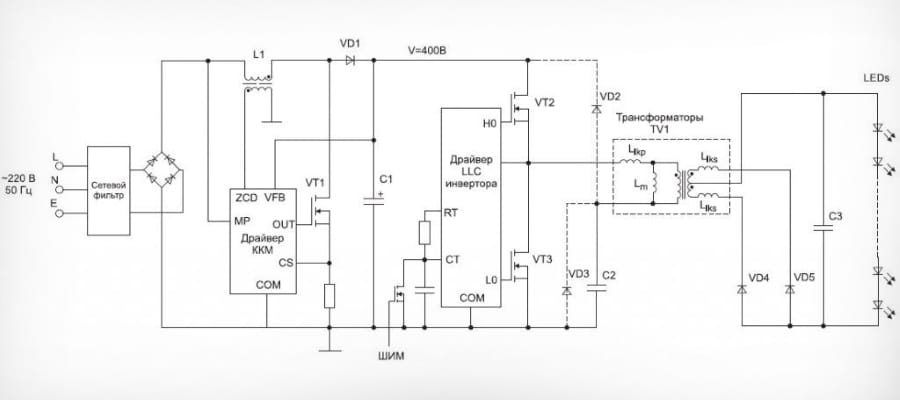
As a rule, the power supply circuit is much simpler than the one presented above. Especially if the lamp is Chinese – they really like to save money.
Another example of an Armstrong luminaire wiring diagram: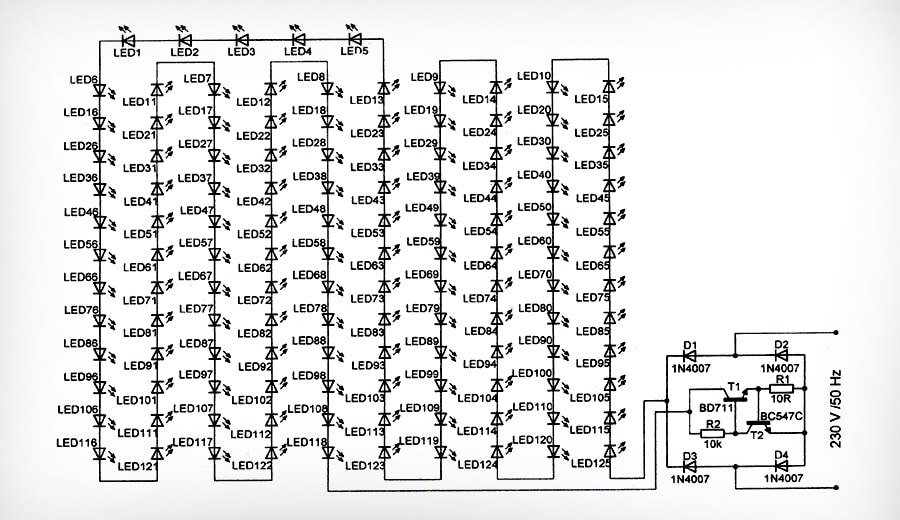
Preparing to repair LED fixtures
To start repairing the Armstrong LED ceiling lamp, you need to do the preparatory work. Preparing to restore an LED pendant light includes a few simple steps:
- Provide electrical isolation for each tool. It is strictly forbidden to use pliers or pliers with bare handles.
- Disconnect the lighting fixture from the power supply, and remove it with a screwdriver, pliers, knife, etc.
- Try to identify the problem by visual inspection and by using a multimeter.
It is also important to pay attention to the instruction manual of the device when preparing to service the pendant lamp. This is necessary for the correct connection of contacts and faster problem detection.
Do-it-yourself Armstrong lamp repair
Self-repair of the Armstrong LED lamp is not difficult to perform if you have basic knowledge of electrical engineering. Let’s talk more about the diagnosis and repair of this type of lamp.
Fault definition
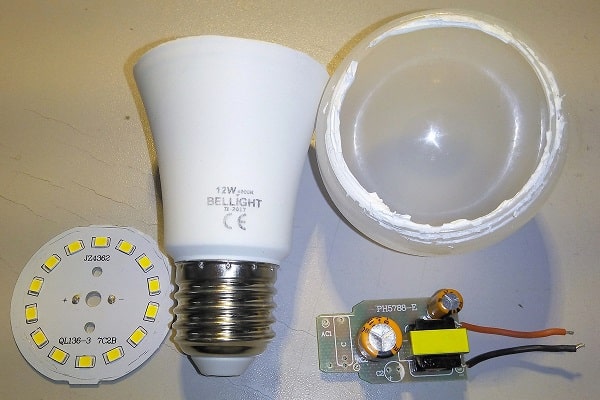
Failure of the lighting device may be due to a malfunction of the power supply ( driver ) or LED in one of the strips. If the driver fails, the first step is to diagnose the fuse, varistor and filter capacitor at the input:
- Faulty fuse. It is not difficult to determine it during a visual inspection – the glass fibers of the lamp will be broken. If so, they must be replaced and the lamp will work.
- Varistor failure. Cracks and burnout appear on the body. The reason may be static voltage, which reaches significant values at low currents.
- Capacitor breakdown. It swells or bursts and fills the plates with electrolyte. Causes can vary, such as high operating temperature (mounted next to a switching transistor without a heatsink) or parasitic currents.
Both of the latter defects are easily eliminated by replacing burnt components and cleaning the plates from carbon deposits or traces of electrolyte.
When an LED fails, the burnt strip must be identified. Faulty diodes can be identified by visual inspection. They have a small black dot on them. After finding the culprit of the breakdown:
- The tape is soldered.
- Carefully detach it from the aluminum base plate.
- Replaced with a similar tape.
The LED may stop working due to overheating, so when assembling the lamp, pay attention to the fit of the LED strip and the housing. If part of the strip does not fit well, lay it so that it is evenly and tightly in contact with the metal – this will increase heat dissipation and increase the life of the lamp.
If a visual inspection does not give results, then the problem is in another node.
In this case, it is impossible to reanimate the lighting device on your own – contact a specialist. But more often than not, repairs to Armstrong LED fixtures can be done by hand.
Step-by-step actions if the Armstrong lamp does not work
Let’s talk in more detail about the general algorithm of actions in the event of a malfunction of the Armstrong LED lamp. What do we have to do:
- Inspect the lamp for signs of wear.
- Check the input voltage of the power supply – the power cord may be damaged.
- Check the output voltage of the power supply – to do this, set the device to measure direct current:
- For 12-24 V power supplies. The output voltage must be stable and the displayed value must not be less than the declared value. Otherwise, replace or repair the unit.
- For driver. The test conditions are the same – insufficient output power indicates a defect. The output voltage should not jump from zero to maximum, this phenomenon is associated with insufficient load and may indicate a malfunction in the LED circuit.
- Check the diodes – to do this, set the multimeter to continuous (minimum resistance) mode. The black probe acts as a contact with a “+” sign. The red probe is negative. Bring the probes to the LED contacts on both sides, changing the polarity.
The value of the information on the screen of the multimeter: O – the diode is working, there is current, OL – the diode is working, but there is no current. The working diodes will light up, followed by the entire module. With this inspection, you can find all the burnt LEDs. Mark with a marker all the points that did not light up – so as not to forget. - Replace burned out LEDs with completely identical ones. Use only the type of diode that is being used. Installation of other models is prohibited, as they have different load currents and will quickly break themselves or turn off the entire circuit.
The connection diagram of the LEDs in the luminaire (there may be more of them, but the order does not change):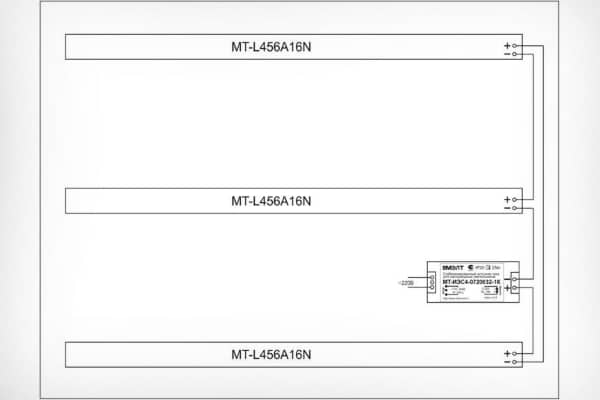
Since modules are used, a series-parallel connection to the power source is carried out, therefore, when one of the serial connection LEDs fails, not the entire circuit fails, but only part of it.
How to change the lamp in the lamp Armstrong?
If a fluorescent lamp on a false ceiling has burned out, it does not matter, you can replace it without the help of an electrician. It is enough to follow these steps:
- Detach the reflector from the lamp by pressing in turn on the fixing tabs in its corners.
- Remove non-working lighting devices (it is desirable to replace both adjacent lamps and both starters at the same time).
- Carefully insert the new LED bulb and starter into the sockets.
- Return the reflector to its place, and snap all the latches.
Helpful hints:
- Sometimes only the starter is broken, but the lamp is intact. This is easy to determine by changing the starter of the lamp that does not shine with a new one.
- If one of the lamps does not work or flashes. It is better to change it immediately. Otherwise, it may lead to other malfunctions, more serious ones.
Repair of the power supply, and what breaks in it more often
The main power supply components worth replacing are varistors (protecting the circuit from high voltage), fuses, and electrolytic capacitors. It is most often impractical to change other elements of the power source. It’s easier to buy a new block, and put it in place of the old one.
At home, you can check the power supply and make repairs in case of failure of the capacitor or fuse.
When it comes to the capacitor, you first need to remove the part and inspect the board. You may notice signs of burning. The cause may be a burned out transformer, most likely such a unit needs to be replaced.
The fuse is checked by ringing. In the event of a breakdown, after replacing and turning on, make sure that there is no short circuit on the LED board, it may oxidize and short-circuit.
More in the video:
Armstrong fluorescent lamp conversion to LED
If a lighting device with fluorescent lamps such as LB-40, LB-80 is out of order, or you are tired of changing starters in it and disposing of light bulbs (it has long been forbidden to throw them into the usual trash), then you can easily convert an obsolete lamp into an LED one and use it in it has diode tapes.
Perhaps this is due to the fact that fluorescent and LED lamps have the same base – G13. Unlike working with other types of contact pins, there is no need to upgrade the housing.
Video instruction:
Electrical Safety
Since we are talking about repairing devices operating over a network, you must remember about safety and follow the rules of caution. All components of the device are under voltage during operation, which can threaten human life. Therefore, the following measures must be observed:
- Make sure there is no voltage. Turn off the input machine and hang a poster on it “Do not turn it on! People are working! For added security, you can disconnect the input wire from the circuit breaker.
- During soldering. If necessary, ensure that the light is turned off during any measurements. Otherwise, you may get burned or get an electric shock.
- In the presence of a discharge resistor that compresses the capacitor. It is still necessary to manually discharge the last element after the repair is completed. This can be done by shortening the capacitor cable with any metal tool provided with an insulated handle.
- When using stairs. As well as building goats, stepladders and other top-mounted towers, someone is needed on a safety net – someone who will hold the structure.
- After renovation. When you turn on the lamp for the first time, take care of your eyes – it is better to turn away from the lamp. Some elements are capable of exploding if the repair steps are not performed correctly.
- Be careful with the soldering iron. And don’t forget to turn it off while relaxing. Do not place the heater on objects that may ignite.
Feedback on the repair of LED lamps
Boris Yu., 32 years old. Armstrong lamps installed in the garage. Recently, one has become nonsense. Upon inspection, I found that the capacitor housing was swollen. I called a familiar electrician – he said to replace the capacitor and clean the board. Repaired, a couple of months already the lamp has been working without failures.
Gennady R., 40 years old. I was upset when the LEDs burned out in the lamp, and I was very surprised that these diode lamps can be repaired. It took 30 minutes and 200 rubles to find a tape with a burnt out diode, unsolder it and change it to a new one.
Armstrong LED fixtures are easy to self-repair in most cases. The most important thing is to do everything carefully, follow the safety rules, which are ways to protect you from an accident, and carry out repairs in stages, according to the instructions.
