LED lighting, created using special tapes, allows you to create original lighting with minimal effort, time and money. For the installation of this design, a special profile is used. What can it be and how to install it correctly?
Purpose of the profile
Basically, the profile is intended for the installation of LED strips that perform the functions of local illumination of various interior objects: floors, ceilings, cabinets, shelves, etc. They are successfully combined with the interior, providing a harmonious atmosphere without flickering. In this case, the LED backlight can serve as the main or decorative lighting.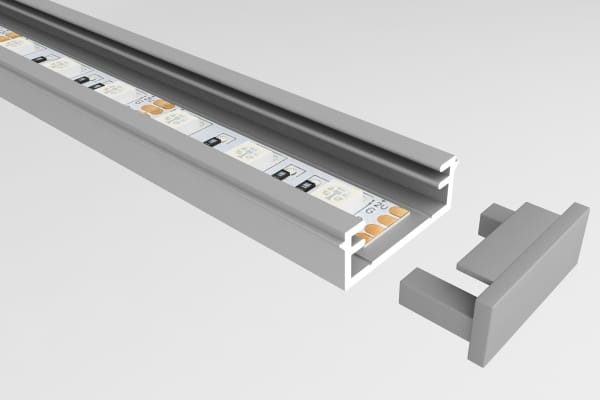
- increase the life of the LED strip, effectively removing heat;
- protect the light source and accompanying wiring from damage;
- scatter the luminous flux with the help of special scattering devices;
- provide easy installation and dismantling of LED elements on interior objects.
Profiles are not only easy to install, but also help to extend the life of LED strips.
Varieties
The range of profiles is quite diverse.
According to the material of manufacture, profiles are divided into the following types:
- Plastic. Although it is less popular than made of aluminum, it has its advantages: low price, elasticity, variety of textures. The plastic profile has a matte transparent finish, is less attractive to vandals and easier to install than the aluminum counterpart.
- Aluminum. Reliable and durable construction. The profile is perfectly protected from external factors, does not lend itself to rust. Better than the plastic counterpart removes heat.
According to the installation method , there are such types of profiles:
- Overhead. The most popular type, because it allows you to easily and simply mount the profile on various surfaces. To do this, you only need screws or glue. It is often installed, making out arches or decorative elements of a rounded shape.
- Angular. This type of profile is used for mounting lighting fixtures in corners. The LED strip is located inside the structure. A distinctive feature is the high brightness of the LEDs. In this regard, you need to get a special diffuser. It is usually removable.
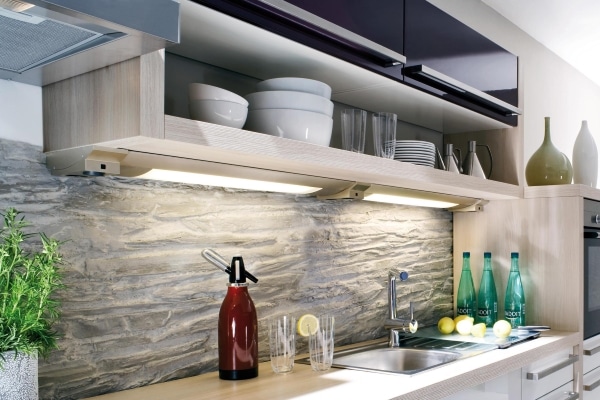
- Embedded (mortise). An original solution that combines drywall and chipboard. It is characterized by the installation of an LED strip in the area of u200bu200bthe connection. The profile differs from other profiles with special edges that cover all the roughness in the grooves. With the help of a built-in design, lighting is mounted in the working area in the kitchen in such a way that the tape is practically invisible.
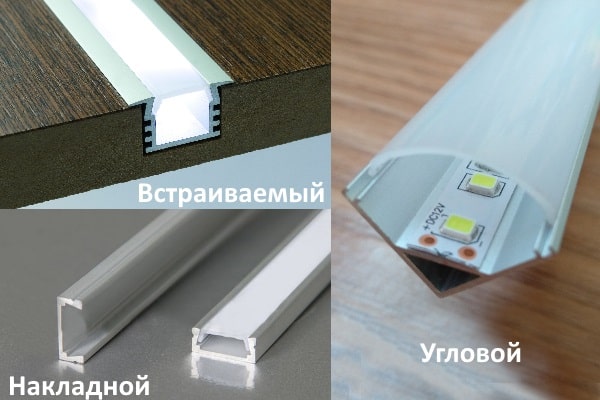
Profile designs also differ in shape and dimensions . The profile shape can be round, conical, rectangular, trapezoidal, square, etc. As for the dimensions, they are directly dependent on the parameters of the LED strip.
Places of application
The use of profiles allows you to fully equip the room with LED lighting both outside and inside. At the same time, the replacement of the previous light sources will be absolutely complete. The profile will protect the lighting elements from the effects of various adverse factors and will perfectly complement any design thanks to the variable mounting methods.
For main lighting
Places of application:
- apartments, houses, offices;
- entrances, street areas;
- industrial premises.
For decorative lighting
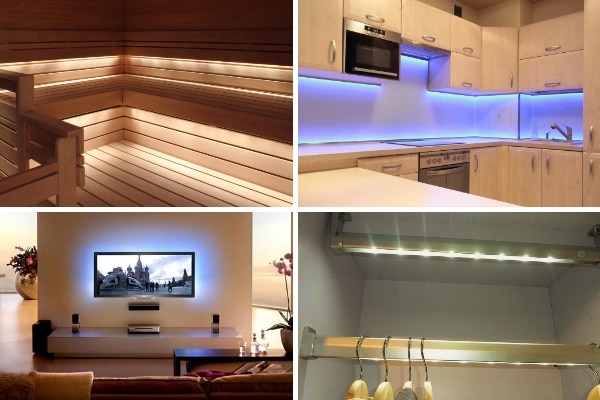
Compact, quite flexible and almost inconspicuous profile allows the development of design imagination. The decorative and at the same time practically significant role of LED lighting is suitable for a variety of places:
- on roads and sidewalks;
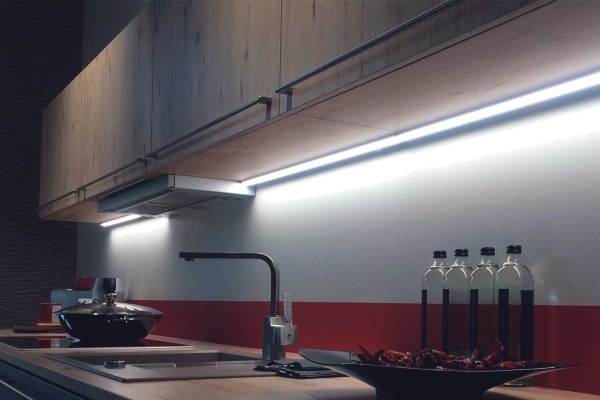
- locally in kitchens for dining tables, cabinets, sinks, hoods;
- inside chests of drawers, bookcases, sideboards;
- to illuminate paintings, vases, shelves, paintings and other interior items;
- in the bathroom, bath, sauna, swimming pool;
- for ceilings and floors (recessed lighting);
- in the windows of jewelry stores.
Main selection criteria
When installing a profile, it is necessary to take into account all the nuances in advance and, accordingly, choose the right design for installing LED strips. In this case, you must adhere to the main criteria for choosing a product:
- the place where the backlight will be mounted;
- the surface on which the profile is installed (walls or ceiling, smooth or rough, etc.);
- installation method (consignment note, mortise or built-in);
- backlight type: general or hidden;
- kind of model.
The most popular is the U-shaped profile. It provides high-quality and uniform distribution of light from LEDs.
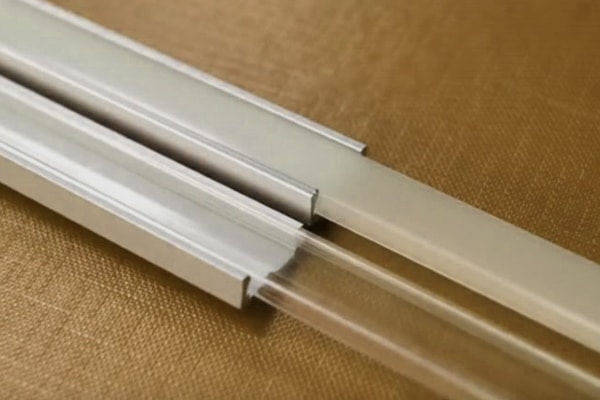
If it is necessary to install a matte screen on the profile, you will also need to select a protective screen: it can vary in color, shape, degree of transparency, as well as in appearance (hidden, convex), etc. The choice of corner fasteners is important as they will shape the look of the curved lighting system. The selection of plugs and fasteners, as well as other accessories to give the lighting system more sophisticated forms is also important. To give a larger area of illumination and shading dark stripes, a diffuser is selected. It also protects against various extraneous damage and moisture. Diffusers can be:
- transparent;
- matte – 60 percent throughput;
- semi-matte – 75 percent throughput;
- internal – inserted into the grooves;
- external – intended for mounting on the sides.
Mounting Features
The installation features of the profile depend on the type of its body, since the surfaces on which they are mounted, as a rule, differ significantly. There are also general installation requirements for all methods: LEDs are installed in the profiles, the power of which does not exceed 3 watts. Installation of any additional substrates for heat dissipation is not required. The design itself will successfully cope with this task. During installation, care should be taken to ensure that direct air access is maintained to each side of the ledge. For example, when installing an overlay profile, the lower surface is already isolated, and therefore it is recommended to decorate it with special gaskets – metal or plastic. It is advisable to use factory fasteners for this purpose, for example, clips. The main thing is that there is a free air passage under the substrate. It is recommended to maintain a minimum distance of 3 mm from the bottom surface to the wall. If for some reason this option cannot be realized, you need to buy a finished product equipped with 15-20 mm sides. This will allow you to mount the profile closely.
Embedded Profile
Installation is carried out in specially made gutters and grooves. It is fastened securely with the help of special holders and is not intended for rearrangement to another place. Can be fixed with glue or by pressing into the surface. To give the ends of the profile a more aesthetic appearance, plugs are used.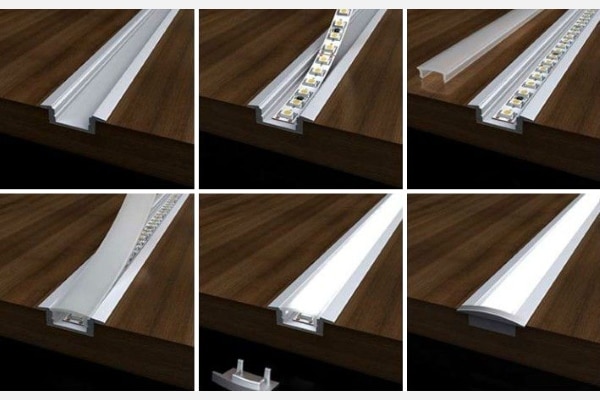
overlay profile
They are used when installing a profile with a tape width of not more than 1 cm. Fastening to the base is most often carried out with screws. But you can also fix it with glue or double-sided tape. This allows you to rearrange the light source without damaging the surface. In this case, no additional fasteners (for example, holders) are required. Also, such designs are immediately supplied with plugs.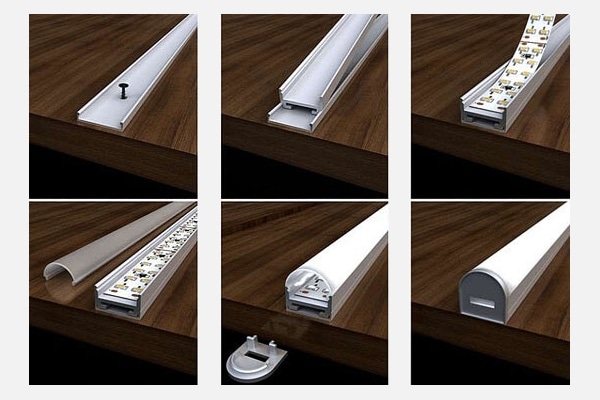
Angle profile
Mounted between ceiling and wall or between two furniture shelves. The LED strip is inside the corner profile. Mounting grooves are made along the edges.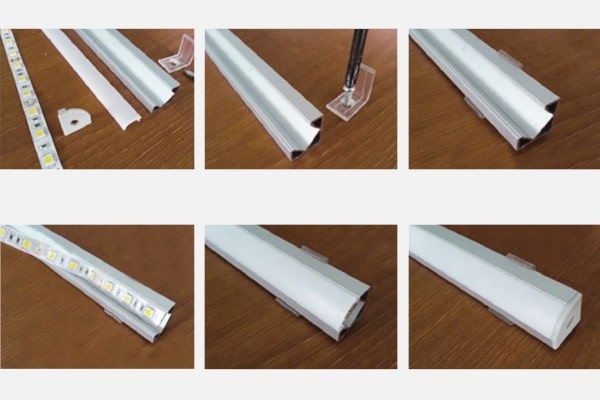
Hanging profile
For fastening to the ceiling, special ropes are used.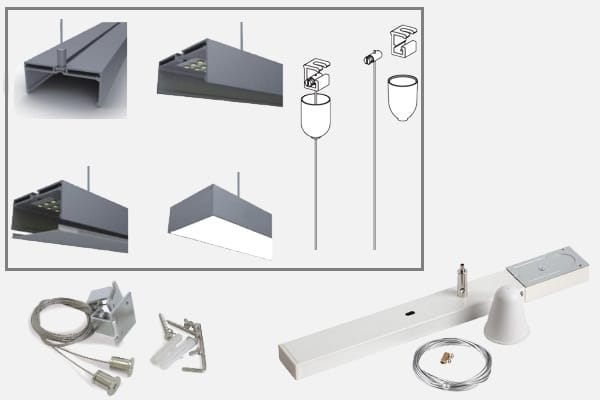
Installation of LED strip
The final stage includes the following procedure:
- Trimming the tape according to the profile parameters. It should be carried out only in specially marked places. For trimming, simple scissors are used.
- Preparation for installation. It includes the removal of the protective layer, which protects the surface treated with glue, and fixing to the profile;
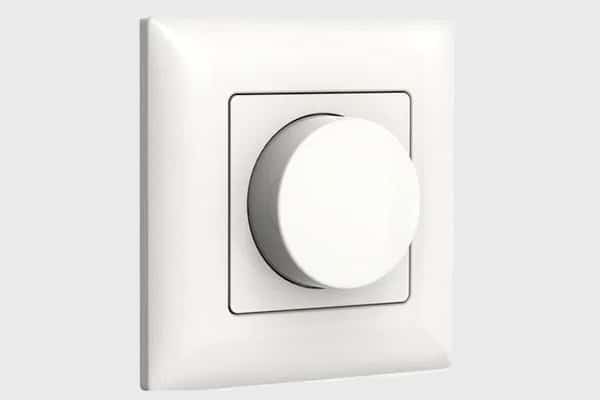
- Connection to the power supply and other elements. To control the on / off function, it is possible to install a touch device that will work from the control panel.
- Connecting to a power source. It is necessary to install diffusers and plugs.
- Checking the functionality of the mounted light source.
- It is advisable to hide the wires used when connecting by placing them in special tubules or behind the wall finish.
How the LED strip is mounted in a profile is shown in the following video: https://youtu.be/zd98MJ7sJ_w?t=4 Having correctly selected and installed the profile for the LED strip, the owner of the premises will be able to significantly improve its beautiful illumination in any desired place. The process of self-installation will take quite a bit of time and effort.


Интересная подсветка, с ней любая комната будет выглядеть нарядной. Хотим такую установить в кухне под навесными шкафчиками, чтобы хорошо освещалась столешница – гораздо удобнее готовить. Здесь, конечно, с установкой и использованием проблем не будет. А еще одну лед-ленту в профиле собираемся установить на лестнице и планируем оставлять ее включенной на всю ночь. Уточнила, что электроэнергии такая подсветка мало тянет, но вот безопасно ли это? Лестница деревянная, с ней граничит стена, обшитая пробкой.
Что то новое узнал. Устанавливал на лоджии освещение из светодиодной ленты. Когда ее покупал в магазине посоветовали купить для нее профиль. Купил. а как его крепить правильно не рассказали. И ни кто из моих знакомых ни когда этого не делал. Пришлось самому. Вроде не сложно. Попалась на глаза эта статья и вот с помощью подсказок из этой статьи получилось их закрепить достаточно быстро, не плохо получилось. А уж ленту саму закрепить на профиле не так уж и сложно… И с этим справился и подключил саму ленту тоже сам)))!
Жалко что только сейчас увидела эту статью , попалась бы она года два назад…
Все по делу, по полочкам разложено.
Будем заново переделывать светодиод на кухне, спасибо что увидела вашу статью.
Спасибо Вам за полезную статью и множество нужных и необходимых советов. Это важно на этапе ремонта и установки светодиодной ленты. Мы сначала при ремонте все почти перепутали и у нас ничего не получилось. Но потом мы нашли данную статью и прочитав ее полностью поняли, в чем была наша проблема. Исправили все, как написано в статье и у нас получилось просто потрясающе! Хорошо, что сейчас есть возможность зайти в интернет и прочитать все, что нужно. Не обращаясь к помощи специалистов по ремонту и установке! Спасибо Вам за статью!
Спасибо большое за статью, она мне очень пригодилась. Делал у себя дома ремонт, устанавливал светодиодные ленты и было крайне важно знать как сделать профиль правильно, чтобы не накосячить и в итоге не переделывать. В статье всё четко и понятно описано, прикрепить профиль получилось с первого раза, светодиодную ленту прикреплять вообще очень просто. Очень люблю светодиодные лампы и подсветки так как они потребляют мало электроэнергии и смотрятся очень изысканно. Я за то чтобы было бы больше таких статей о том как что-то сделать самому.