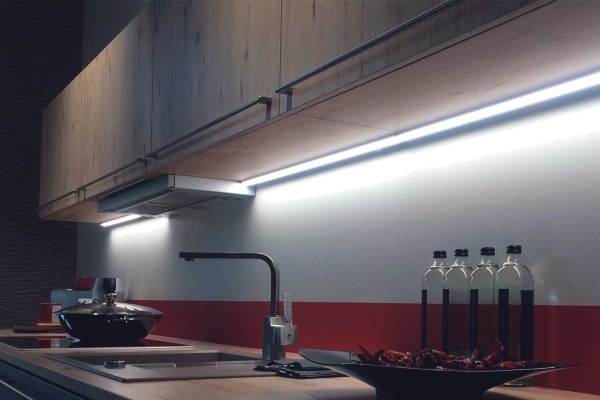
It is customary to equip modern apartments and houses with innovative lighting, so lighting for kitchen cabinets is considered an integral part of interior design. But not only the appearance attracts users – there are other important factors on which convenience depends.
- The purpose and benefits of lighting under cabinets
- Where is the best place to install lighting under cabinets?
- Types of cabinet lighting
- Tape with LEDs
- LED lights
- Overhead lamps
- Built-in furniture lamps on diodes
- Ways to mount the backlight
- Self-tapping fastening
- Tape fixation
- Adhesive fixation
- Varieties of switches
- Conventional switches: pushbutton or chain
- Proximity sensors
- Remote control
- Combined
- Installation of lighting under kitchen cabinets, and the necessary materials
- Choice of lighting fixtures
- Selection of power supply and controller for RGB tape
- Preparing for installation
- Do-it-yourself installation
- Installation Features
- Kitchen lighting constructor
The purpose and benefits of lighting under cabinets
A few years ago, lighting was not installed under kitchen cabinets, since it was customary to mount only chandeliers, sconces and the like, which caused discomfort to the hostess. This is due to the fact that the direction of the light flux from one source, especially if it is located on the ceiling, cannot reach all points of the working area.
If enough light does not reach the countertop, the cooking process slows down and, even worse, the person’s eyes are strained, which causes not only fatigue, but also reduced visual acuity. Lighting under the cabinets completely solves this problem – light:
- distributed evenly;
- does not blind the eyes;
- does not allow dark areas, etc.
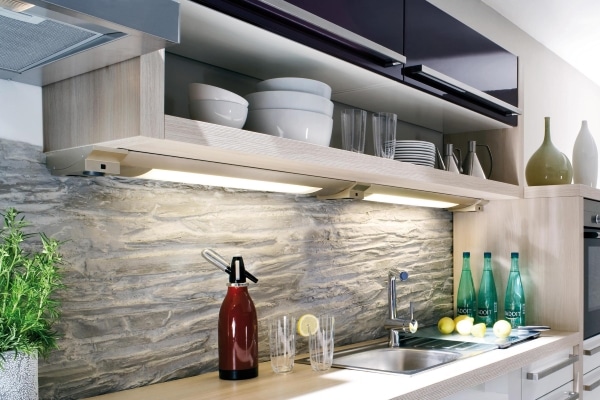
Most often, LED lamps are used as this auxiliary lighting, so there are many advantages in the design. What are the main advantages:
- eyes do not strain;
- injury (cut, burn, etc.) is excluded, as excellent visibility is obtained;
- very long service life – at least 10 years;
- saving electricity (Led-lamps consume little electricity);
- it is possible to install “smart” systems to turn the backlight on and off;
- ease of installation;
- relatively low cost;
- the widest range not only in shape, but also in the color of the lamps, cost and other indicators;
- the speed of incandescence, due to which the light becomes bright immediately;
- safety of use, as there is no overheating;
- environmental friendliness – diodes do not contain harmful substances;
- moisture resistance;
- the ability to create any design;
- suitable for all interior styles;
- can be placed at different angles, on uneven surfaces, on curved furniture.
Where is the best place to install lighting under cabinets?
The specific location of the lighting under the wall cabinet in the kitchen depends on the task. Namely, what function will it perform, that is, for what purposes:
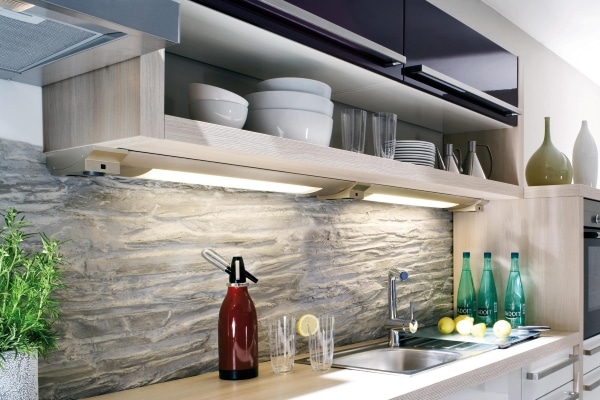
- Bottom surface near the wall. In this case, the number of shaded areas from the hands of a working hostess and objects standing on the countertop is reduced. It is convenient to clean vegetables, cut meat and fish, cut products.
- The bottom surface is closer to the doors. The lighting will appear as bright as possible, but shadows will be present.
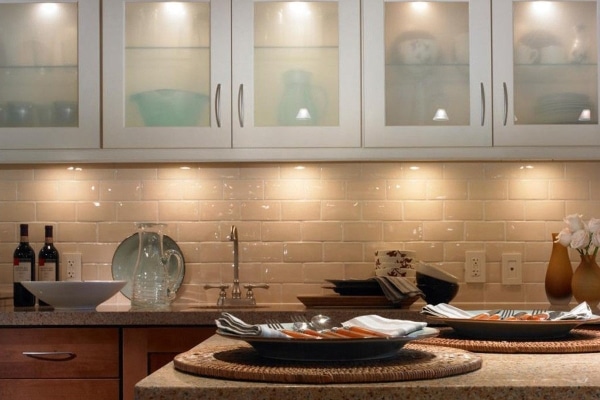
- Bottom surface on both sides. The most optimal option, since with this arrangement of lighting elements, brightness is preserved and shadow is excluded.
Do not forget to consider the overall style of the interior – so that the LED lamps match the design.
Types of cabinet lighting
Today, there are a huge number of varieties of lighting fixtures for illuminating the kitchen under the cabinets. The choice always remains with the user. It depends on many factors – personal preferences, design, material capabilities, etc.
Tape with LEDs
The LED strip is a construction of a long base (on average, 5-10 m) with built-in diodes, which are located along the strip at the same or different distances from each other.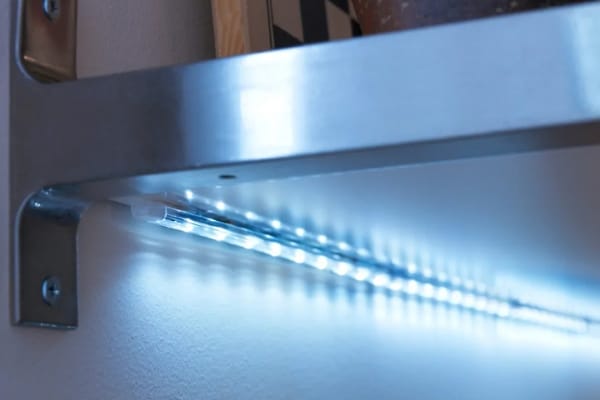
The tape version of the kitchen cabinet lighting is considered an excellent option, because it has several advantages:
- glare-free and uniform illumination;
- speed of installation;
- the ability to install both on the profile and directly on the cabinet, up to the bottom of the doors;
- accuracy of appearance – harmoniously fits into the classics, minimalism and similar interior styles.
There are 3 types of LED backlight on the tape:
- open ribbons. This is not the best option if lighting is required under the sink or in places with high humidity, temperature changes, the risk of grease, as the level of security is low. For this reason, it is desirable to mount the exposed tape in a profile with a light diffuser.
- Single sided tape. These are tapes that are equipped with protective elements on the side of the diodes, so the resistance to humidity is average.
- Double sided tape. In this case, the strip is hermetically sealed on all sides from moisture, grease, etc. The level of security is high.
LED lights
This type of LED lamps is called – spots. They come in a variety of configurations, but there is one common detail – a swivel mount. At the same time, the number of reflectors is different – both one and many.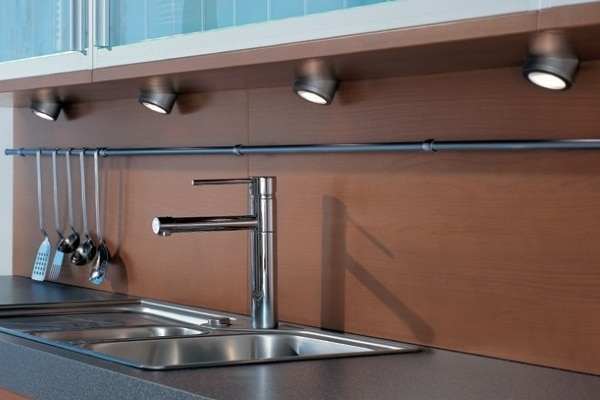
Application advantages:
- the ability to change the direction of the light flux due to the rotary mechanism;
- increased durability, as models are made from heavy-duty materials;
- excellent decorative properties;
- practically do not emit heat, therefore they are safe to use;
- ease of installation.
The weak side of spots is overpriced.
Kinds:
- Outdoor hanging. Brackets, cables are used for fastening.
- Overhead on furniture. For installation, a metal profile or a wooden grate is required.
- Mortise spots. This is a built-in version, fastened with spring-loaded “legs”.
Overhead lamps
Another good option for kitchen lighting. These are designs with LEDs that have a reliable housing. It is screwed into the bottom surface of the cabinet using self-tapping screws.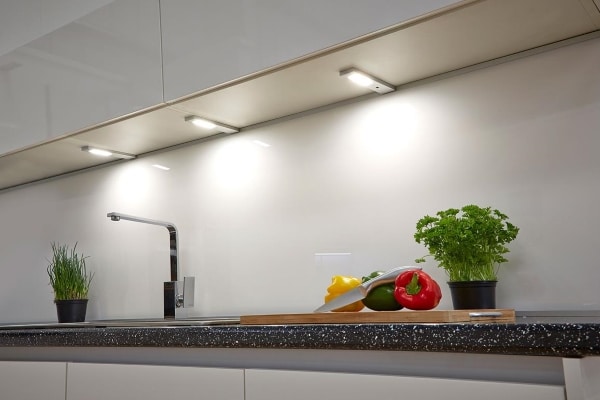
Pros:
- high level of protection against moisture and grease;
- not afraid of high temperatures;
- easy to clean;
- easy to install;
- has a high level of resistance to mechanical damage.
Built-in furniture lamps on diodes
These models involve “large-scale” installation, so it will be difficult for a beginner. Nevertheless, it is quite possible, the main thing is to have desire and aspiration. Installation requires drilling an appropriate hole in the bottom of the cabinet, where the lighting structure will be inserted.
You will definitely need holes for the output of wires, so you need to act as carefully as possible so as not to spoil the furniture.
Embedded models are distinguished by type:
- Touch. This is an ultra-modern and very convenient option, involving the inclusion of light by touch or reaction to the movement of a person in close proximity.
- Linear. They are distinguished by strong brightness, but due to their low power, they are installed in conjunction with voltage converters.
- Furniture. They are characterized by small dimensions, but bright lighting.
Ways to mount the backlight
As already mentioned, installing the backlight is not so difficult, so you can do it yourself. It is very important to decide on the technique of fastening the LED strip, which is considered the most popular. There are only three ways, each has its own pros and cons, features, which significantly affects the choice.
Self-tapping fastening
Installation of structures using self-tapping screws is the most reliable, but also time-consuming. Despite this, users note that this design looks very prestigious, even when using a conventional LED strip.
In this case, it is installed in a pre-fixed aluminum profile, which is covered with a diffuser element.
Other types of fixtures are also fixed on self-tapping screws – built-in, overhead, rotary.
Tape fixation
It is used for spot and strip lighting with LEDs. It has the following advantages:
- installation speed;
- relatively inexpensive cost;
- no need to use additional tools.
The disadvantages are minimal – it is important to properly attach the adhesive tape, as it immediately adheres firmly.
Adhesive tape is only needed double-sided, since one side is glued to the tape, the other to the surface of the cabinet.
Adhesive fixation
The adhesive base is not considered reliable for the kitchen, as elevated temperatures and humidity reduce the properties of the adhesive. Therefore, you will have to buy expensive funds that have high rates of resistance to these adverse factors.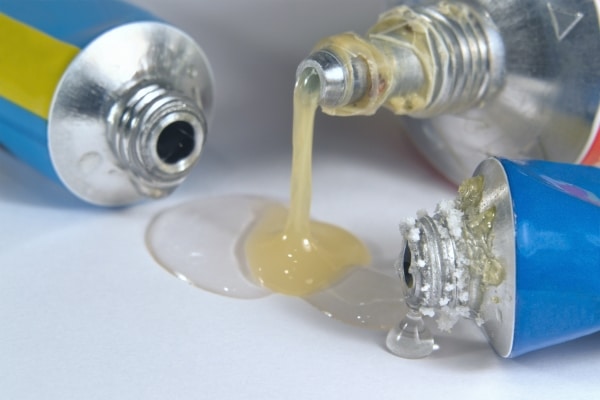
What else to look for when choosing an adhesive base:
- drying speed – the faster the better;
- structure – gel-like glue is easier to apply;
- high adhesive properties – so that the tape is firmly glued to any surface of kitchen cabinets.
“Putting” LED lighting fixtures on the adhesive is easy, quick and simple, but be careful not to spread the liquid and the tape does not change location. Be sure to take into account the risk factor – the glue can be chemically harmful, so wear a respirator and ventilate the kitchen.
Varieties of switches
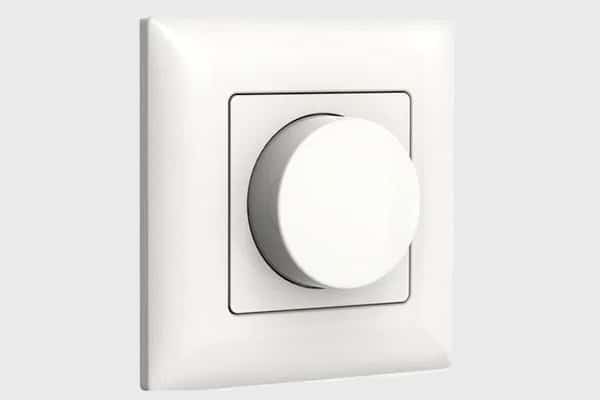
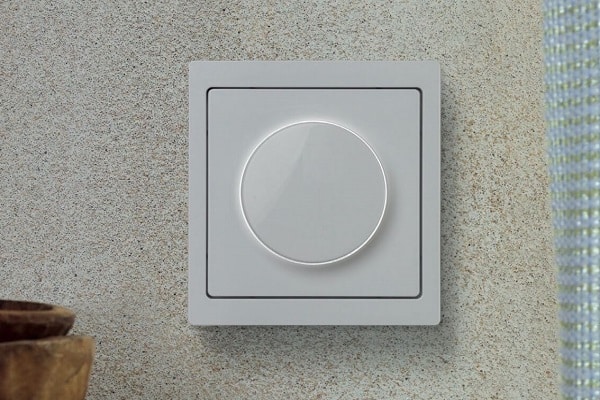
The operational possibilities of lighting in the kitchen under the cabinet depend on the type of switch. For example, if you use a conventional model, you will have to press the buttons every time, if the sensor is of a non-contact type, just wave your hand. Therefore, pay special attention to the features of each method.
Conventional switches: pushbutton or chain
If you are unable to purchase expensive fixtures, use a conventional switch that can work in two variations.
The varieties are as follows:
- Chain. There is another name – slider. Outwardly, it is a plastic case with a moving slider.
- Button. Standard switch with button in the middle. This has been used by people for decades.
Despite the simplicity of the devices, conventional switches are considered the most reliable and durable, and they also have a ridiculous cost.
Proximity sensors
Proximity switches are popular among fans of innovative technologies. The main advantage is that it does not require much effort to turn the lighting on and off (pressing buttons, looking for a switch in the dark, etc.).
To start and end, just execute one of the commands – for example, wave your hand. It is possible to install a motion sensor nearby, and then the “smart” system will respond to the mere presence of the hostess.
The main disadvantage is the high cost of the device and the same costly maintenance (in the event of a breakdown, failure). Despite this, this does not stop connoisseurs of modern technology.
Remote control
The “golden mean” among the previous 2 options is the control of the on / off functions using the remote control – the price category is average, the convenience is at a good level.
Failure can only occur if the batteries “die”. At the same time, the problem is solved quickly and simply – the damaged elements are replaced with new ones.
Combined
Practical people prefer this method of connecting and disconnecting kitchen lighting, since the combined type of switch successfully combines 2 types of appliances. This could be a push button switch along with a proximity sensor, etc.
Installation of lighting under kitchen cabinets, and the necessary materials
Kitchen lights under the cabinets are completely installed on their own, but some types require a certain amount of experience. For example, in the case of built-in luminaires or proximity sensors. Nevertheless, and this is “not a sentence”, the main thing is to carefully study the diagrams and other installation features before starting work.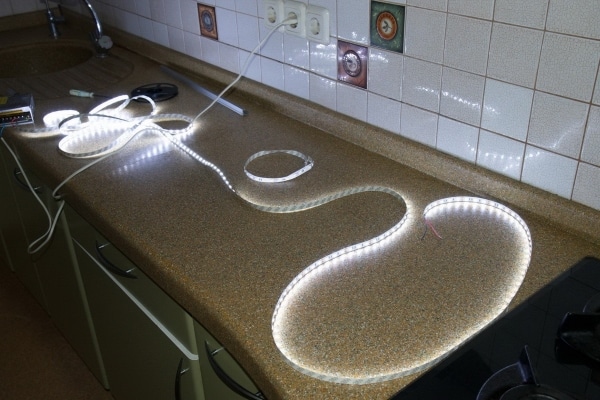
Choice of lighting fixtures
The first thing to do is to choose the type of lighting device. This is not difficult to do, given the main selection criteria. What to pay attention to first of all:
- Power. Measured in watts (watts), it indicates the luminous efficiency of lighting fixtures and the speed of consumption of electrical energy. This applies to LED lamps, and these indicators are secondary, since small denominations transmit very bright light, unlike, for example, incandescent lamps.
Therefore, you will not find designations in 70, 80, 90 and 100 watts. For LED bright lighting, indicators of 12 and 24 watts are provided. - Glow power. It is reflected in lm (lumens), completely interconnected with power. A diode light flux is the energy power of rays, a set of quanta emitted into space.
Therefore, if the power of the LEDs is from 10 to 13 W, then in lumens the indicators will be about 400 lm, if from 25 to 30 W, then 1200 lm. - glow temperature. It is measured in K (kelvins). For the human eye, a white warm glow is optimal. The higher the values, the colder the light is transmitted. For example:
- cold glow – from 6500 to 9500 K;
- neutral – from 4000 to 6500 K;
- warm – from 2500 to 4000 K.
- Security. Protection is needed from moisture and dust, to which lighting lamps are especially sensitive, and which is very important for the kitchen space. The degree of security in IP is measured. To these letters are added numbers indicating the level of protection (the higher the indicator, the more reliable). It looks like this:
- from 0 to 5 indicates protection against dust and other solid particles, where 5 means that even the smallest dust is not afraid of the device;
- From 0 to 8 indicates protection against moisture, where 8 means completely waterproof.
In addition, pay special attention to the variety of LEDs for cartridge-base compatibility. Namely, so that the diode base is in harmony with the technical characteristics of the cartridge. The classification is divided into such groups – E, B, G, P, S.
But these are not all parameters, there are others:
- SMD LED. It is a heat-removing aluminum or copper substrate on which diode crystals are placed. From above they are covered with a phosphor. The angle of light emission varies from 100 to 130 degrees. The power is high, the color of the lamps is exclusively white.
- Filament LED. The substrate has a cylindrical shape, due to which the light flux goes at an angle of 360 degrees. The glow is similar to incandescent lamps.
- COB. A lot of SMD type crystals are stacked on the board, there is a phosphor coating. It features a powerful luminous flux and a scattering angle of 180 degrees.
Selection of power supply and controller for RGB tape
It is also important to choose the right power supply, thanks to which the current supply is controlled and regulated. The fact is that the socket is 220 V, and the LED lamps work on 12 and 24 V.
Power supplies, as well as controllers, come in different capacities, so when installing LED lighting in the kitchen under the cabinets on your own, you will have to calculate the required power. To do this, there is the following scheme, presented as an example:
- LED strip has a linear power of 12 W;
- the length of the tape that will be used for illumination is 7 m;
- multiply both indicators among themselves – 12 x 7 \u003d 84;
- to increase the level of reliability, use a coefficient equal to 1.25;
- now multiply again 84 x 1.25 = 105.
Approximately this power should be in the power supply for conventional diodes.
There are also RGB LED strips that do not require a power supply, but an RGB controller. This device differs from a conventional power supply in that it is equipped with a remote control, switches, since both the tape and the controller are designed for colored lamps. The output power of the controller varies from 72-74 to 220-280 watts.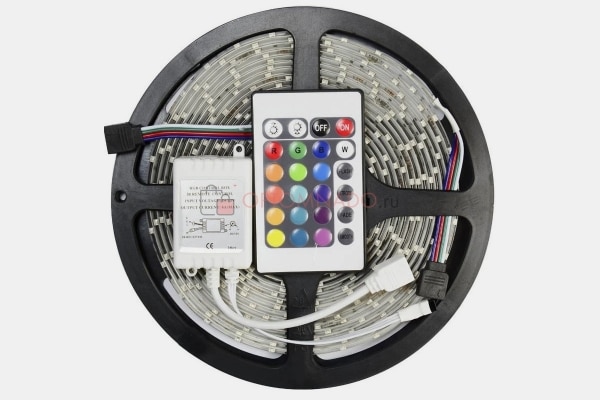
Preparing for installation
In order for the installation of LED lighting to be quick and successful, it is important to prepare all the necessary tools and materials in advance. It is very important to calculate the number of diodes for cabinet lighting in the kitchen. There are from 30 to 240 pieces. in 1 p. m, depending on the type of lighting device.
What you need:
- LED strip;
- switch and power supply;
- stranded copper cable (from 0.75 to 1.5 sq. mm);
- network cable for 220 V;
- aluminum profile;
- degreaser (if necessary for the treatment of all surfaces when using adhesive tape or glue);
- masking tape;
- double-sided tape;
- insulating tape;
- screwdriver or drill;
- soldering kit;
- knife and scissors;
- miter saw or hacksaw for metal;
- yardstick.
If corners are involved, prepare a mounting bracket and appropriate connectors.
Do-it-yourself installation
At the very beginning of the work, clearly determine the installation location of the lighting under the cabinets. Draw the diagram with exact lines along which the installation will be carried out. Then follow the step by step instructions:
1. Prepare the LED strip. To do this, use sharp scissors to cut it off (the length should correspond to the layout of the lighting fixture under the cabinets). Make cuts strictly along the dotted lines indicated on the tape (sometimes scissors are drawn).
If you do not cut along the dotted lines, the risk of structural failure increases, that is, you will cut the contacts and the system will fail.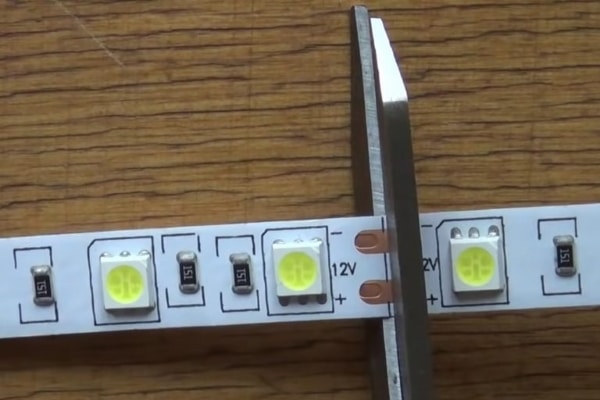
2. Solder the cut fragments to the standard wires.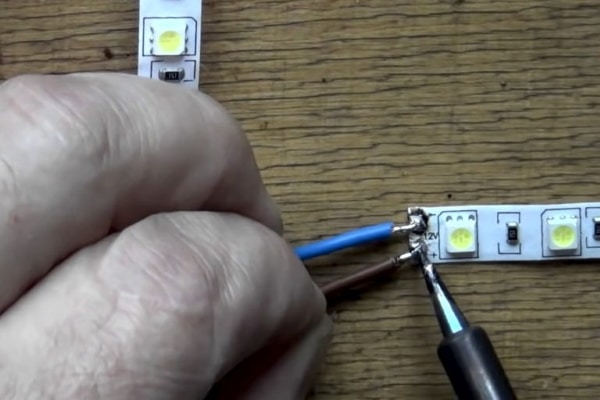
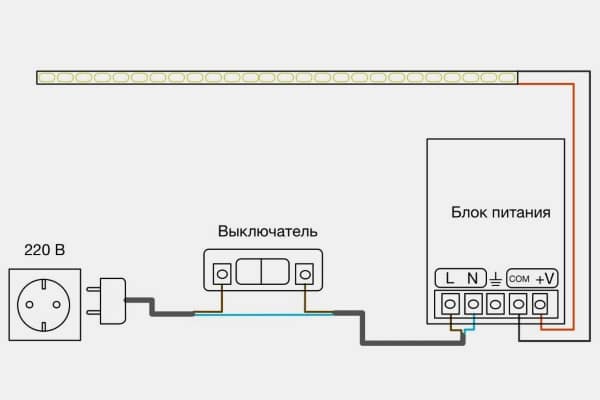
3. Assemble the structure together to test the functionality. Namely, connect all available wires to the power supply, switch, etc. Proceed strictly according to the diagram, especially when using a proximity sensor, as shown in the first diagram.
On the second, read the connection of LED lighting when using a rocker switch. Plug in.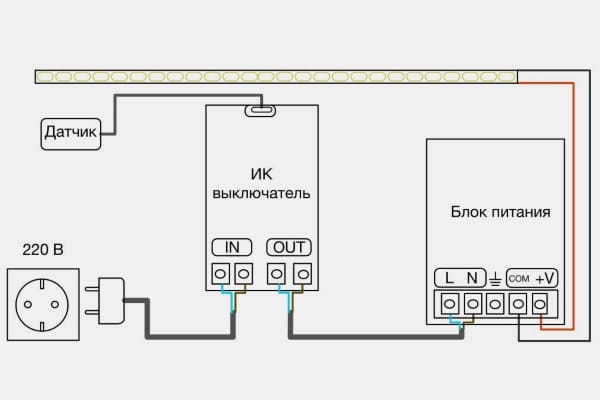
4. Take care of the profile. Since it is made of aluminum, cut off the required piece with a hacksaw. Do not forget that there will be plugs along the edges, so cut off 1-2 cm more, otherwise the profile will stick out from under the bottom of the cabinet.
The lighting profile is paired with a light diffuser, so you need to cut 2 elements at once. Be careful as the diffuser may crack. To prevent this from happening, wrap the cut with masking tape.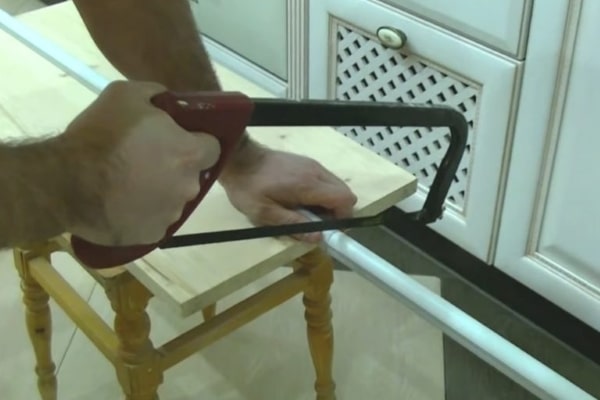
5. Mount the profile on the cabinet surface. The kit usually comes with special clips that easily snap into place. If not, use one of the options:
– make holes at a distance of about 1 m from each other, insert self-tapping screws and screw them into the furniture with a screwdriver;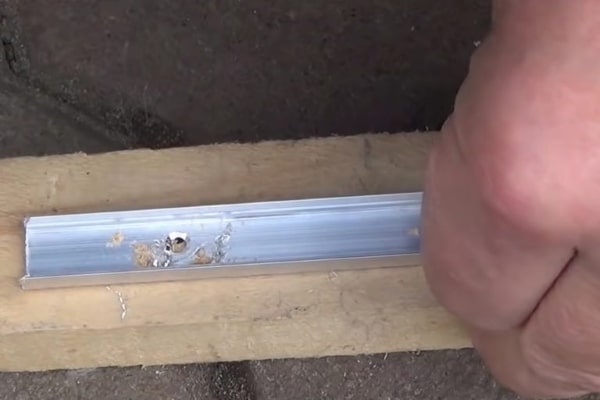
– take a double-sided adhesive tape, detach the protective film and glue it to the outer side of the profile with gentle movements, remove the film from the other side and fix the structure on the bottom surface of the cabinet.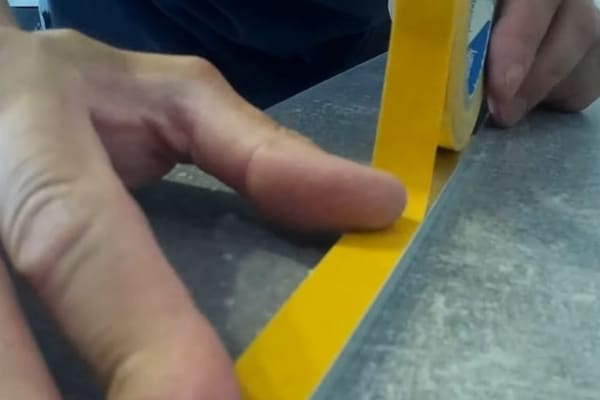
6. Glue the LED strip to the inside of the profile using double-sided tape. Remember to pre-degrease all surfaces.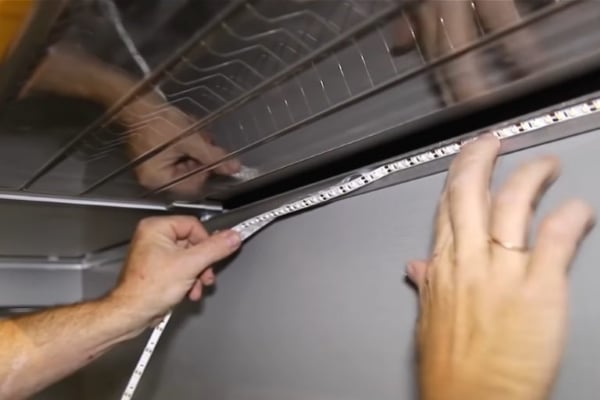
7. Insert diffuser. To do this, remove the film and simply install in the grooves. Then install the caps.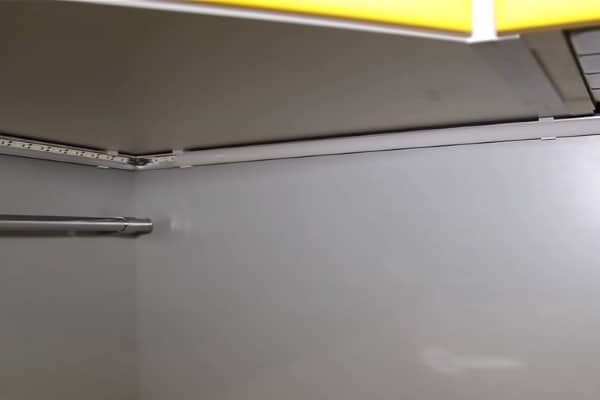
8. Mount the switch. Usually it is located directly under the wall cabinet or on the wall nearby. If you do not have experience with the installation of electricians, entrust the matter to a specialist.
Carry out the assembly of the electrical circuit, as in the preliminary check, but screw all the bolts and other fasteners with high quality. Where necessary, insulate wires, close all covers, etc.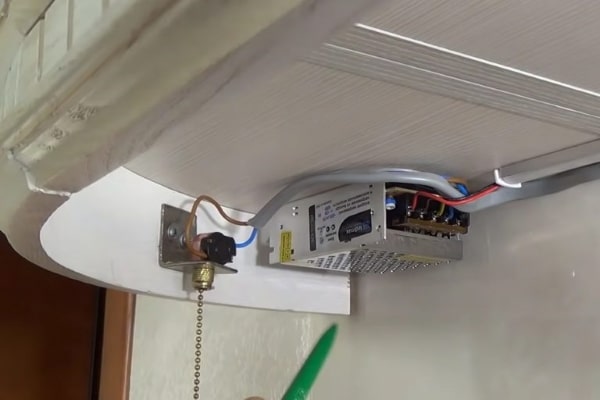
9. Turn on the system to test.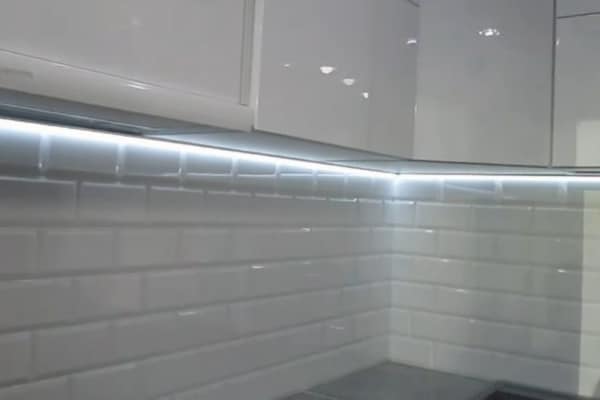
Installation Features
A person who at least sometimes faces the installation of any devices will easily cope with the task. But someone who decides to install lighting in the kitchen under the cabinets for the first time can make a mistake. To prevent this, experienced professionals give their useful recommendations for installing lighting:
- never buy an LED strip and other components in spontaneous markets or from unverified sellers – during installation, problems may arise with inconsistencies in the elements;
- to connect the wires correctly, pay attention to the inscriptions on the tape – there are symbols with “+” and “-“;
- if there is no blowtorch, buy connectors to fasten the wiring;
- not all power supplies are sealed, so it is better to install them away from sources of moisture;
- do not connect the LED strip in series, it is better to buy an additional power supply – this way there will be no overload;
- with a large number of wires on one block, use connecting terminals or a soldering iron;
- if the tape is mounted in a profile with a diffuser, then the power of the lamps must be 2 times greater, otherwise the light will be dim.
It is especially difficult for a beginner to cope with the design of the backlight, which involves a gap, for example, for a hood, etc., or a corner placement.
But even in this case, you can simplify the task – just buy a special kit that divides the system into 2 or more zones. The bypass uses an ultra-thin and soft wire, which is easy to hide behind the exhaust structure.
Other Tips:
- never bend the LED strip in the corner areas, as the contacts connecting the diode crystals are too fragile, so they break easily;
- in the corners it is advisable to install a separation kit or cut the tape and fasten it with a connector in the center of the corner;
- for a corner, purchase an angular type profile;
- if the profile is straight, then for the corner, cut it at an angle of 45 degrees, and then connect the structure.
Kitchen lighting constructor
In order for the kitchen cabinet structure to look as aesthetically pleasing as possible, which is important for design art, it is better to hire a designer. If this is not possible, you can use the highlight designer. It can be found on various websites that offer the corresponding product.
Standard constructors are equipped with special selectors that determine the parameters of the lighting set – what type of LED lamps to choose, how many meters of tape, cable, wires and profiles are needed, what type of power supply is required, etc.
Illumination for the kitchen under the cabinets is a universal solution both in terms of design, and for saving energy, the comfort of working at the countertop. The possibility of self-assembly also attracts the attention of users, so feel free to get down to business, but first study all the subtleties and nuances of installation.
